The Complete Solar Panel Cleaning Guide: Steps, Tools & Costs
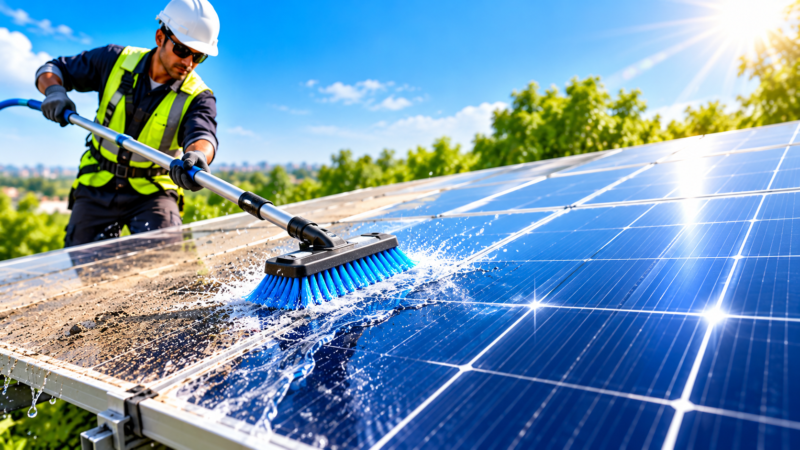
So you’ve installed solar panels, you’re watching your electricity bills shrink, and everything seems to be running smoothly. But a few months in, you start wondering — do these panels actually need maintenance, and if so, how exactly do you go about it? You’re not alone. Most solar owners receive detailed guidance on installation and financing, but very little practical instruction on the ongoing care their system actually needs. As one rooftop solar installer commonly tells new customers, “we’ll teach you how the system works, but nobody ever teaches you how to keep it working at its best — that’s where cleaning comes in.”
This solar panel cleaning guide is designed to fill exactly that gap. Whether you’re a first-time solar owner wanting to handle maintenance yourself, or simply trying to understand what a professional cleaning service should actually be doing, this comprehensive guide covers every dimension — tools, techniques, frequency, safety, and costs — so you can make informed decisions about keeping your system performing at its peak.
Why This Guide Matters: The Performance Connection
Before diving into the how-to details, it’s worth understanding why this solar panel cleaning guide exists in the first place. Solar panels generate electricity by converting sunlight into energy through photovoltaic cells. Any layer of dust, grime, or debris sitting on the panel surface physically blocks sunlight from reaching these cells, directly reducing energy output.
Research suggests that neglected panels can lose anywhere from 15-25% of their generation capacity within just a few months, with losses climbing even higher in dusty or high-pollution regions. This guide exists to help you prevent that loss through proper, consistent maintenance practices.
Step 1: Understanding Your Panel Type and Manufacturer Guidelines
Before attempting any cleaning, the first step in any proper solar panel cleaning guide is checking your system’s specific manufacturer guidelines. Different panel coatings, frame materials, and mounting angles can have slightly different care requirements.
Most manufacturers provide a maintenance manual at the time of installation specifying recommended cleaning agents, safe water pressure limits, and any specific precautions. If you no longer have this documentation, your installer or manufacturer’s customer service can typically provide a digital copy upon request.
Step 2: Determining the Right Solar Cleaning Frequency
One of the most common questions homeowners have is simply: how often should cleaning actually happen? Solar cleaning frequency depends heavily on your location and environmental conditions.
General Frequency Guidelines:
- Low-dust residential areas: Every 4-6 weeks
- High-dust regions (Rajasthan, parts of Gujarat, central India): Every 2-3 weeks during dry seasons
- Coastal areas (salt residue concerns): Monthly
- Industrial or high-pollution zones: Every 3-4 weeks
- Immediately post-monsoon: One thorough cleaning to remove mineral deposits and water spots left behind by rainfall
Keep in mind that solar cleaning frequency isn’t a fixed, one-size-fits-all number — it’s worth periodically inspecting your panels visually, especially after dust storms, prolonged dry spells, or heavy bird activity in your area, and adjusting your schedule accordingly.
Step 3: Gathering the Right Tools
A proper solar panel cleaning guide wouldn’t be complete without specifying exactly what tools you need. Using the wrong equipment is one of the most common mistakes solar owners make, sometimes causing more harm than the dirt itself.
Essential Tools for DIY Cleaning:
- Soft-bristled brush or squeegee designed specifically for solar panels (avoid stiff or abrasive brushes)
- Deionized or soft water (avoid hard water, which leaves mineral deposits)
- A garden hose with a gentle spray nozzle (avoid high-pressure jets)
- A long-handled cleaning pole for rooftop access without climbing directly onto panels where possible
- Non-abrasive, solar-panel-specific cleaning solution (plain water is often sufficient; avoid household detergents or glass cleaners with ammonia)
- Safety harness or rooftop anchor points if physical access to the roof is required
Avoiding metal scrapers, abrasive sponges, or high-pressure power washers is critical, as these can scratch the protective glass coating and permanently reduce panel efficiency.
Step 4: The Actual Cleaning Process (DIY Method)
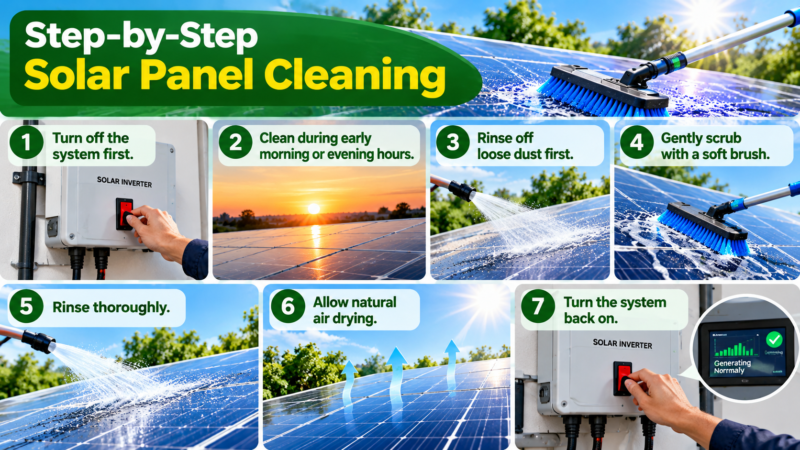
For those comfortable handling DIY solar panel cleaning, here’s the step-by-step process recommended by most solar maintenance professionals:
1. Turn off the system first.
Most installers recommend switching off the solar inverter before cleaning, both for safety and to prevent any interference with monitoring systems during the process.
2. Clean during early morning or evening hours.
Avoid cleaning panels during peak sun hours when they’re hot — pouring water on hot glass can cause thermal shock, leading to micro-cracks over time. Early morning or late evening, when panels are cool, is ideal.
3. Rinse off loose dust first.
Use a gentle hose spray to remove loose surface dust before any physical scrubbing, preventing dust particles from scratching the surface during brushing.
4. Gently scrub with a soft brush.
Using your soft-bristled brush or squeegee, gently clean the panel surface in smooth, even strokes, paying particular attention to corners and edges where debris tends to accumulate.
5. Rinse thoroughly.
Rinse the panels again with clean, soft water to remove any remaining residue, ensuring no soap or cleaning solution is left behind to dry and create streaks.
6. Allow natural air drying.
Avoid wiping panels dry with cloths, which can introduce scratches. Natural air drying is sufficient and safer for the panel surface.
7. Turn the system back on.
Once panels are completely dry, restore power to the inverter and confirm the system is generating normally.
Step 5: Understanding Solar Cleaning Costs
A major part of any practical solar panel cleaning guide is understanding the actual costs involved, whether you choose DIY or professional cleaning.
DIY Cleaning Costs:
If you clean panels yourself, costs are minimal — primarily a one-time investment in proper tools (soft brush, squeegee, hose attachment), typically ranging from ₹500-2,000 depending on tool quality, with no recurring costs beyond water usage.
Professional Cleaning Costs:
Professional solar cleaning cost typically ranges from ₹3-8 per panel for residential systems, depending on location, accessibility, and service provider. For a typical residential system with 15-20 panels, this translates to approximately ₹500-1,500 per cleaning session.
Annual Maintenance Contracts:
Many solar companies now offer annual maintenance packages covering multiple cleaning cycles throughout the year, typically priced between ₹3,000-8,000 annually for residential systems, depending on cleaning frequency and system size. For commercial or larger installations, costs scale accordingly but often come with volume discounts.
Cost-Benefit Perspective:
When weighed against the potential 15-25% efficiency loss from neglected cleaning, even professional solar cleaning cost represents a small fraction of the value protected — making regular maintenance one of the most cost-effective decisions in overall solar ownership.
Step 6: When to Choose Professional Cleaning Over DIY
While DIY solar panel cleaning works well for many ground-mounted or easily accessible residential systems, certain situations call for professional service:
- Steep or high rooftop installations where safe personal access is difficult or dangerous
- Large commercial or utility-scale systems requiring specialized equipment like automated robotic cleaners
- Systems under warranty where manufacturer terms may specify professional cleaning to maintain warranty validity
- Coastal or heavily polluted areas where specialized cleaning solutions may be needed to handle salt or industrial residue effectively
Professional services also typically include a basic inspection alongside cleaning, catching early signs of wiring issues, loose mounting, or panel damage that an untrained eye might miss.
Step 7: Essential Solar Maintenance Tips Beyond Cleaning
A complete solar panel cleaning guide should also cover broader solar maintenance tips that complement regular cleaning for optimal system performance:
Monitor Generation Data Regularly:
Most modern solar systems come with monitoring apps or dashboards. Regularly checking generation data helps you spot unusual drops in output early, prompting timely cleaning or inspection before losses accumulate significantly.
Trim Overhanging Branches:
If trees near your installation create partial shading, regular trimming prevents both shading losses and reduces leaf/debris accumulation on panels.
Inspect Mounting and Wiring Periodically:
While not directly related to cleaning, periodically checking that mounting brackets remain secure and visible wiring shows no wear supports overall system longevity alongside your cleaning routine.
Address Bird Nesting Promptly:
Birds nesting underneath panels can create droppings buildup and potential wiring damage. Installing simple bird-proofing mesh during installation prevents this common maintenance headache.
Schedule Professional Inspections Annually:
Even if you handle regular cleaning yourself, an annual professional inspection helps catch technical issues like connector wear or inverter performance that cleaning alone won’t reveal.
Seasonal Cleaning Considerations
Summer (Pre-Monsoon):
This is peak generation season, making cleaning particularly important. Dust accumulation during dry summer months can be substantial, so following your established solar cleaning frequency schedule closely during this period maximizes seasonal generation benefits.
Monsoon Season:
While rain provides some natural cleaning, it’s not a complete substitute for manual cleaning, as it often leaves mineral deposits and water spots behind. A light inspection after heavy rainfall helps determine if additional cleaning is needed.
Post-Monsoon:
A thorough, comprehensive cleaning immediately after monsoon season ends is highly recommended, removing accumulated mineral deposits and preparing the system for the upcoming dry season’s dust challenges.
Winter:
Shorter days mean lower overall generation, but dust accumulation often continues, particularly in northern Indian regions. Maintaining regular cleaning through winter ensures you’re maximizing the limited daylight generation available.
Common Mistakes to Avoid
Even well-intentioned solar owners following a solar panel cleaning guide can make these common errors:
- Using hard water — leaves mineral deposits that themselves reduce efficiency over time
- Cleaning during peak sun hours — risks thermal shock and potential micro-cracking
- Using abrasive materials — scratches reduce long-term light transmission through panel glass
- Applying excessive water pressure — can damage seals and electrical connections
- Neglecting edges and corners — these areas often accumulate the most debris but get overlooked during quick cleaning sessions
- Skipping cleaning during cooler months — assuming lower generation season means maintenance doesn’t matter, when consistent care remains important year-round
Conclusion: Making Cleaning a Routine, Not an Afterthought
This solar panel cleaning guide ultimately comes down to one core principle: treating cleaning as a scheduled, routine part of solar ownership rather than an occasional afterthought. Whether you choose to handle DIY solar panel cleaning yourself with the right tools and techniques, or invest in professional services with manageable solar cleaning cost, the key is consistency aligned with your specific regional solar cleaning frequency needs.
By following the steps outlined in this guide — understanding your panel specifications, using proper tools, maintaining the right frequency, and incorporating broader solar maintenance tips — you ensure your solar investment continues delivering maximum value throughout its full 25-year lifespan. A system that’s properly maintained doesn’t just generate more electricity; it protects the entire financial and environmental logic that made solar the right decision for you in the first place.
FAQs About the Solar Panel Cleaning Guide
Q: Can I use tap water to clean solar panels?
A: It’s best to avoid hard tap water as it leaves mineral deposits. Soft or deionized water is recommended for streak-free results.
Q: What time of day is best for cleaning solar panels?
A: Early morning or evening, when panels are cool, is ideal to avoid thermal shock from cold water hitting hot glass.
Q: How much does professional solar panel cleaning cost?
A: Professional cleaning typically costs ₹3-8 per panel, translating to approximately ₹500-1,500 for a standard residential system per session.
Q: Is it safe to clean solar panels myself?
A: For ground-mounted or easily accessible systems, yes. For steep or high rooftop installations, professional cleaning is recommended for safety.
Q: Does rain eliminate the need for manual cleaning?
A: No, rain provides partial cleaning but often leaves mineral deposits and water spots that still require manual or professional attention.
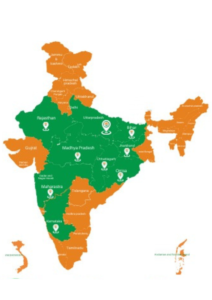
Trusted by 50000+ Customers
Anya Green Energy is a leading solar company and Solar Energy service provider established in 2013. We are recognized by startup India and customer best choice award 2022.
Our Achievements :
Recognized by Startup India.
Purvanchal’s first solar company to operate exclusively with solar products.
Certified by well-known institutions such as MSME, IndiaMart, and Just Dial and many more.
Winner of the Best Customer Choice Award 2022.
Over 50,000 happy customers across India.